
CPR & AED
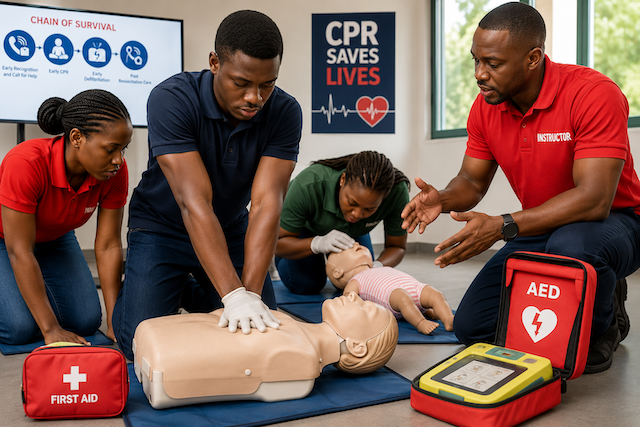
Introduction to CPR and AED
CPR means Cardiopulmonary Resuscitation. It is an emergency life-saving skill used when a casualty is unresponsive and not breathing normally. CPR helps maintain blood flow to the brain, heart, and other vital organs until emergency medical help arrives.
AED means Automated External Defibrillator. It is a portable device that checks the heart rhythm and, if needed, gives an electric shock to help the heart restart a normal rhythm. CPR and early AED use are two of the most important actions in cardiac arrest.
A first aider does not need to diagnose the exact cause of collapse. The key responsibility is to recognise an emergency quickly, call for help, start CPR, and use an AED as soon as one is available. Current resuscitation guidance continues to emphasise early recognition, early CPR, and defibrillation as key parts of survival from cardiac arrest.
What Is Cardiac Arrest?
Cardiac arrest occurs when the heart suddenly stops pumping blood effectively. When this happens, the casualty becomes unresponsive and stops breathing normally, or may only gasp.
Cardiac arrest is life-threatening. Without immediate CPR and defibrillation, the chance of survival reduces quickly.
Common signs include:
- Sudden collapse.
- No response when spoken to or gently tapped.
- Not breathing normally.
- Gasping, noisy, or irregular breathing.
- Pale, grey, or bluish skin.
- No purposeful movement.
Gasping is not normal breathing. If the casualty is unresponsive and not breathing normally, begin CPR immediately.
Difference Between Heart Attack and Cardiac Arrest
A heart attack and cardiac arrest are not the same, although a heart attack can lead to cardiac arrest.
| Condition | Meaning |
|---|---|
| Heart attack | Blood flow to part of the heart is blocked |
| Cardiac arrest | The heart stops pumping blood effectively |
A person having a heart attack may still be awake and breathing. A person in cardiac arrest is unresponsive and not breathing normally.
If a casualty becomes unresponsive and is not breathing normally, treat it as cardiac arrest and start CPR.
First Response Sequence
When you find a collapsed casualty, follow this sequence:
- Check the scene for danger.
- Check responsiveness.
- Shout for help.
- Open the airway.
- Check breathing for no more than 10 seconds.
- Call the local emergency number.
- Ask someone to bring an AED.
- Start CPR if the casualty is not breathing normally.
- Use the AED as soon as it arrives.
- Continue until help arrives or the casualty recovers.
If you are alone, call emergency services on speakerphone so you can start CPR while receiving instructions.
Scene Safety Before CPR
Before starting CPR, make sure the area is safe.
Check for:
- Traffic.
- Fire.
- Electricity.
- Violence.
- Gas, fumes, or chemicals.
- Falling objects.
- Water or wet surfaces.
- Sharp objects.
- Moving machinery.
- Blood or body fluids.
Do not become a second casualty. Move closer only when it is safe to do so.
Checking Responsiveness
To check responsiveness:
- Approach from the front if possible.
- Speak loudly: “Are you okay?”
- Tap the shoulders gently.
- Look for movement, speech, eye opening, or normal response.
For an infant, do not shake the baby. Tap the foot gently and look for response.
If there is no response, shout for help immediately.
Opening the Airway
An unconscious casualty’s tongue can relax and block the airway. Open the airway before checking breathing.
For adults and children:
- Place one hand on the forehead.
- Gently tilt the head back.
- Lift the chin with two fingers.
For infants:
- Keep the head in a neutral or slightly tilted position.
- Do not overextend the neck.
- Lift the chin gently.
Remove only visible objects from the mouth. Do not perform blind finger sweeps.
Checking Breathing
Check breathing for no more than 10 seconds.
Look, listen, and feel:
- Look for chest movement.
- Listen for breathing sounds.
- Feel for air from the mouth or nose.
Normal breathing should be regular and effective. Gasping, occasional noisy breaths, or irregular breathing should be treated as abnormal.
If the casualty is unresponsive and not breathing normally, call emergency help and start CPR. The NHS advises calling emergency services and starting CPR straight away when someone is unconscious and not breathing normally.
Calling for Help
A first aider should activate emergency help early.
If others are nearby:
- Point to one person and say: “Call emergency services now.”
- Point to another person and say: “Bring the AED.”
- Ask someone to control the crowd.
- Ask someone to guide emergency responders to the scene.
Use clear instructions. Do not just shout generally, because people may freeze or assume someone else will act.
Adult CPR
Adult CPR is used for a casualty who has reached puberty or is physically adult-sized.
Start CPR if the adult is:
- Unresponsive.
- Not breathing normally.
Adult CPR focuses on strong, fast, effective chest compressions with minimal interruptions.
Adult Chest Compression Position
To perform adult chest compressions:
- Place the casualty flat on their back on a firm surface.
- Kneel beside the chest.
- Place the heel of one hand in the centre of the chest.
- Place the other hand on top.
- Interlock your fingers.
- Keep your arms straight.
- Position your shoulders directly above your hands.
- Press straight down.
Do not press on the ribs, stomach, or lower end of the breastbone.
Adult Compression Depth and Rate
For adults:
| Skill | Requirement |
|---|---|
| Compression location | Centre of the chest |
| Compression depth | About 5–6 cm |
| Compression rate | 100–120 compressions per minute |
| Compression style | Push hard and fast |
| Chest recoil | Allow full rise after each compression |
| Interruptions | Keep pauses as short as possible |
Adult CPR guidance commonly recommends compressing the chest by 5–6 cm at a rate of 100–120 compressions per minute.
Adult CPR With Rescue Breaths
If trained, able, and willing, give CPR with rescue breaths.
The standard adult sequence is:
- Give 30 chest compressions.
- Open the airway.
- Pinch the nose.
- Seal your mouth over the casualty’s mouth.
- Give 1 breath over about 1 second.
- Watch for the chest to rise.
- Give a second breath.
- Continue cycles of 30 compressions and 2 breaths.
The NHS describes adult CPR with 30 compressions followed by 2 rescue breaths, continuing until the person recovers or emergency help arrives.
Hands-Only CPR
If you are not trained, not confident, or unable to give rescue breaths, perform hands-only CPR.
Hands-only CPR means:
- Call emergency services.
- Place hands in the centre of the chest.
- Push hard and fast at 100–120 compressions per minute.
- Continue until help arrives, an AED is ready, or you cannot continue.
Hands-only CPR is better than doing nothing. The Red Cross states that chest compressions should be provided for all adults in cardiac arrest, and rescue breaths may be added by responders who are trained, able, and willing.
Rescue Breathing
Rescue breaths provide oxygen to the casualty. They are especially important in children, infants, drowning, choking-related collapse, and breathing-related emergencies.
To give rescue breaths:
- Open the airway.
- Pinch the nose for adults and children.
- Seal your mouth over the casualty’s mouth.
- Blow steadily for about 1 second.
- Watch for chest rise.
- Allow the chest to fall.
- Give a second breath.
For infants, cover both the mouth and nose with your mouth and use gentle puffs.
Do not overinflate. Give only enough air to make the chest rise.
Barrier Devices
A barrier device helps reduce contact with saliva, vomit, blood, or body fluids.
Examples include:
- Face shield.
- Pocket mask.
- Bag-valve-mask, for trained responders.
Use a barrier device if available, but do not delay chest compressions while searching for one.
The Red Cross notes that responders can reduce infection risk by taking safety precautions when feasible and using PPE or barrier devices when available.
Child CPR
Child CPR is used for a child from about 1 year old to puberty.
Children often suffer cardiac arrest because of breathing problems, choking, drowning, severe asthma, trauma, poisoning, or infection. Because breathing problems are common in children, rescue breaths are especially important.
The Red Cross notes that for children and infants, cardiac arrest is often preceded by a respiratory event, and responders with a duty to respond may consider beginning with rescue breaths or ventilations in suspected respiratory causes.
Child CPR Steps
For a child:
- Check safety.
- Check responsiveness.
- Shout for help.
- Open the airway.
- Check breathing for no more than 10 seconds.
- If not breathing normally, call emergency help and start CPR.
- Give rescue breaths if trained.
- Give 30 chest compressions.
- Continue 30 compressions and 2 breaths.
- Use an AED as soon as available.
Some paediatric first aid systems teach 5 initial rescue breaths before compressions for children, especially when the cause is likely respiratory. NHS guidance for children recommends opening the airway, giving 5 initial rescue breaths, then continuing 30 compressions and 2 breaths.
Child Compression Technique
For a child:
- Place one hand on the centre of the chest.
- Use two hands if the child is larger or if one hand is not enough.
- Press down about one-third of the chest depth.
- Aim for about 5 cm in many children.
- Compress at 100–120 per minute.
- Allow full chest recoil.
- Minimise interruptions.
NHS guidance describes compressing a child’s chest by about 5 cm, approximately one-third of the chest diameter, at 100–120 compressions per minute.
Infant CPR
Infant CPR is used for a baby under 1 year old, excluding newborn resuscitation immediately after birth.
Infant CPR must be gentle but effective. Infants are small, so hand position, head position, and breath size are very important.
Infant CPR Steps
For an infant:
- Check safety.
- Check responsiveness by gently tapping the foot.
- Shout for help.
- Open the airway carefully.
- Check breathing for no more than 10 seconds.
- If not breathing normally, start CPR.
- Give rescue breaths if trained.
- Give chest compressions.
- Continue cycles of compressions and breaths.
- Use an AED with paediatric pads if available and advised.
NHS guidance recommends giving 5 initial rescue breaths for infants, then continuing with 30 compressions and 2 rescue breaths.
Infant Compression Technique
For an infant:
- Place two fingers in the centre of the chest, just below the nipple line.
- Press down about one-third of the chest depth.
- Aim for about 4 cm.
- Compress at 100–120 per minute.
- Allow the chest to rise fully between compressions.
- Keep the airway in a neutral position.
- Use gentle breaths, just enough to make the chest rise.
NHS guidance describes infant compressions using two fingers, about 4 cm deep or one-third of the chest diameter, at 100–120 compressions per minute.
One Rescuer vs Two Rescuers
When there is one first aider, focus on calling for help, starting CPR quickly, and using an AED.
When there are two trained responders:
- One person performs compressions.
- The second person gives rescue breaths or prepares the AED.
- Switch compressor roles about every 2 minutes if possible.
- Keep interruptions short.
- Communicate clearly.
For children and infants, some professional and healthcare settings use a 15:2 ratio when two healthcare professionals are present. For lay first aid training, 30:2 is commonly taught and easier to remember. The Red Cross states that for children and infants, 30:2 is used by one healthcare professional and by lay responders, while 15:2 may be used by two healthcare professionals.
CPR Quality
High-quality CPR improves the chance of survival.
Good CPR means:
- Start quickly.
- Push hard enough.
- Push fast enough.
- Allow full chest recoil.
- Keep hands in the correct position.
- Avoid long pauses.
- Avoid leaning on the chest.
- Give effective rescue breaths if trained.
- Change compressor when tired.
- Use an AED early.
Poor-quality CPR may not circulate enough blood.
When to Stop CPR
Continue CPR until:
- Emergency medical help takes over.
- The casualty starts breathing normally and shows signs of life.
- An AED tells you to pause for analysis or shock.
- You are physically unable to continue.
- The scene becomes unsafe.
- A qualified medical professional tells you to stop.
Do not stop just because ribs may be injured. Chest injuries can occur during CPR, but cardiac arrest is immediately life-threatening.
AED: What It Does
An AED checks the casualty’s heart rhythm and decides whether a shock is needed.
An AED can:
- Analyse the heart rhythm.
- Give voice prompts.
- Tell rescuers when to continue CPR.
- Tell rescuers when to stand clear.
- Deliver a shock if required.
An AED will not shock unless it detects a shockable rhythm.
When to Use an AED
Use an AED when a casualty is:
- Unresponsive.
- Not breathing normally.
Use it as soon as it is available. Do not delay CPR while waiting for an AED. Send someone else to get it if possible.
AED Safety
Before using an AED:
- Ensure the casualty is not lying in water.
- Dry the chest if wet.
- Remove clothing from the chest.
- Remove or cut through clothing if needed.
- Keep oxygen sources away from the chest where applicable.
- Do not touch the casualty during rhythm analysis.
- Make sure everyone is clear before pressing shock.
- Follow the AED voice prompts.
AEDs are designed to guide rescuers step by step, but scene safety still matters.
AED Use: Step-by-Step
To use an AED:
- Turn on the AED.
- Follow the voice prompts.
- Expose the chest.
- Dry the chest if wet.
- Attach pads as shown on the pad diagrams.
- Plug in the connector if required.
- Allow AED to analyse.
- Make sure nobody touches the casualty.
- If shock is advised, shout “Clear!”
- Press the shock button if instructed.
- Immediately resume CPR after shock.
- If no shock is advised, resume CPR.
- Continue following prompts until help arrives.
Do not remove AED pads after a shock. Leave them attached and continue CPR as directed.
AED Pad Placement for Adults
For adults, place AED pads:
- One pad on the upper right chest, below the collarbone.
- One pad on the lower left side of the chest, below the armpit.
Pads must stick firmly to bare skin.
If the chest is very hairy and pads do not stick, use a razor if available or apply and remove one set of pads quickly to pull hair away, then place a new set.
AED Use for Children
For children, use paediatric pads or paediatric mode if available.
If paediatric pads are not available, use standard adult pads. It is better to use an AED than to delay defibrillation.
Pad placement may be:
- Standard front-side placement if pads do not touch.
- Front-and-back placement if the chest is small.
Follow the AED diagrams and voice prompts.
AED Use for Infants
AED use in infants should follow the device instructions and local training guidance. Paediatric pads or paediatric mode are preferred if available.
If there is no paediatric option and the infant is in cardiac arrest, use the available AED and follow prompts. Ensure pads do not touch each other. Front-and-back placement may be needed.
The priority is to continue CPR and use the AED without unnecessary delay.
Special AED Considerations
| Situation | What to Do |
|---|---|
| Wet chest | Dry the chest before attaching pads |
| Casualty lying in water | Move away from water if safe |
| Medication patch | Remove patch with gloved hand and wipe area |
| Implanted device | Place pad at least a few centimetres away |
| Hairy chest | Shave or remove hair only if pads will not stick |
| Pregnant casualty | Use AED and CPR as normal |
| Metal surface | AED can still be used if pads are correctly placed and no one touches casualty |
| Oxygen present | Keep oxygen flow away from chest during shock |
Do not delay AED use unnecessarily.
CPR for Drowning-Related Collapse
Drowning-related cardiac arrest is usually caused by lack of oxygen. Rescue breaths are very important.
For a drowning casualty who is unresponsive and not breathing normally:
- Call emergency help.
- Open airway.
- Give rescue breaths if trained.
- Start CPR.
- Use AED as soon as available.
- Continue until help arrives or the casualty recovers.
The Red Cross guidance notes that drowning-process resuscitation should begin with rescue breaths or manual ventilations once cardiac arrest is recognised.
CPR for Choking-Related Collapse
If a choking casualty becomes unresponsive:
- Lower them carefully to the ground.
- Call emergency help.
- Start CPR.
- After compressions, open the mouth and remove any visible object.
- Do not do blind finger sweeps.
- Continue CPR.
- Use AED when available.
Chest compressions may help dislodge the object.
Vomiting During CPR
Vomiting can happen during CPR.
If the casualty vomits:
- Turn the casualty carefully onto their side.
- Clear visible material from the mouth.
- Protect yourself from body fluids.
- Turn them back onto their back.
- Reopen the airway.
- Continue CPR.
Do not spend too long clearing the airway unless it is blocked.
Recovery After CPR
If the casualty starts breathing normally:
- Stop compressions.
- Keep the airway open.
- Place the casualty in the recovery position if there is no suspected spinal injury and they remain unconscious but breathing.
- Keep the AED pads attached.
- Monitor breathing continuously.
- Be ready to restart CPR if breathing stops.
- Keep the casualty warm.
- Reassure them if they regain consciousness.
- Hand over to emergency responders.
A casualty can deteriorate again, so continue monitoring.
Handing Over to Emergency Responders
When help arrives, give clear information:
- What happened.
- Time casualty was found.
- When CPR started.
- Whether rescue breaths were given.
- When AED was applied.
- Number of shocks delivered, if known.
- Any changes in breathing or response.
- Any known medical history.
- Any hazards at the scene.
Good handover helps medical responders continue care quickly.
Common CPR Mistakes
Avoid these mistakes:
- Delaying CPR while looking for perfect conditions.
- Mistaking gasping for normal breathing.
- Pressing too softly.
- Pressing too slowly or too fast.
- Leaning on the chest between compressions.
- Stopping compressions too often.
- Giving overly forceful rescue breaths.
- Forgetting to call for help.
- Failing to ask for an AED.
- Touching the casualty while AED is analysing.
- Delaying shock when AED advises it.
- Removing AED pads too early.
- Stopping CPR because of fear of causing injury.
What a First Aider Should Never Do
A first aider should never:
- Put themselves in danger.
- Delay calling emergency help.
- Leave an unresponsive non-breathing casualty without CPR.
- Give blind finger sweeps.
- Give rescue breaths if not trained, confident, or protected and they are unwilling.
- Touch the casualty during AED analysis or shock.
- Place AED pads over wet skin, medication patches, or directly over implanted devices.
- Stop CPR too early.
- Assume a child or infant does not need rescue breaths.
- Fail to monitor a casualty who starts breathing again.
- Hide important information from emergency responders.
Practical CPR Training Points
During practical training, learners should practise:
- Checking scene safety.
- Checking responsiveness.
- Calling for help.
- Opening the airway.
- Checking breathing.
- Adult chest compressions.
- Child chest compressions.
- Infant chest compressions.
- Rescue breaths using manikins.
- AED pad placement.
- AED voice-prompt response.
- Switching rescuers.
- Recovery position after return of normal breathing.
- Emergency handover.
Practice should be done on training manikins only, not on real people.
Practical Skill Checklist
| Skill | Competent |
|---|---|
| Checks scene safety | |
| Checks responsiveness | |
| Calls for help clearly | |
| Opens airway correctly | |
| Checks breathing for no more than 10 seconds | |
| Starts CPR promptly | |
| Places hands correctly for adult CPR | |
| Uses correct compression depth and rate | |
| Allows full chest recoil | |
| Gives rescue breaths correctly where trained | |
| Demonstrates child CPR technique | |
| Demonstrates infant CPR technique | |
| Uses AED safely | |
| Keeps clear during AED analysis and shock | |
| Resumes CPR immediately after AED prompt | |
| Gives clear handover |
Real-Life Scenario
A man collapses during a workplace meeting. He does not respond when spoken to or tapped. A first aider checks the area and confirms it is safe. The first aider opens the airway and checks breathing. The man is gasping irregularly, but not breathing normally.
The first aider tells one person to call emergency services and another person to bring the AED. CPR begins immediately with chest compressions. When the AED arrives, the pads are attached to the bare chest, everyone is told to stand clear, and the AED analyses the rhythm. A shock is advised and delivered. CPR resumes immediately after the shock.
Emergency responders arrive and take over. The first aider explains when the casualty collapsed, when CPR started, and how many shocks were delivered.
The key lesson is simple: fast action matters. Recognise cardiac arrest, call for help, start CPR, and use an AED as early as possible.
Quick Recap
CPR is used when a casualty is unresponsive and not breathing normally. It helps maintain blood flow to the brain and vital organs until medical help arrives. Adult CPR uses chest compressions in the centre of the chest at a rate of 100–120 per minute and a depth of about 5–6 cm. Trained responders may add rescue breaths using a 30:2 ratio. Children and infants often need rescue breaths because their emergencies are commonly related to breathing problems. Child compressions are about one-third of chest depth, often around 5 cm, while infant compressions are about one-third of chest depth, often around 4 cm. An AED should be used as soon as available. Follow its voice prompts, keep everyone clear during analysis and shock, and resume CPR immediately after each prompt. A first aider should act quickly, safely, and confidently.